How To Build A Stone Wall: A DIY Guide


Stone walls are a timeless addition to any home. While constructing them can be tough DIY work, the reward is a beautiful feature for your yard that can last centuries. If you’re looking to craft your own stone wall, our DIY guide will explore the standard stone wall styles and teach you how to build a stone wall of your very own.
A stone wall is a stone wall is a stone wall, right?
Well, maybe not.
Believe it or not, there’s actually an incredibly wide range of stone wall styles. Below, we’ll discuss the standard and traditional types. That said, if you’re envisioning a stone wall style not covered in our guide, don’t fear. You can customize stone walls entirely to your taste and desires.
A single freestanding stone wall is a type of stone wall that you can craft yourself relatively easily. Place a row of stones onto the ground and add additional rows until your wall reaches its necessary height.
Similar to a single freestanding wall, a double freestanding wall uses two lines of stone rows, rather than one. The result is a stronger structure.
To build a laid stone wall, select stones of a specific shape or size to create a more precise structure. Laid walls can be single or double configurations.
A single freestanding wall, double freestanding wall, and laid wall can all be built without mortar. With a mosaic wall, you organize the stones in a specific pattern to create your desired mosaic and then use mortar to keep the stones in place.
Veneer walls are made of concrete or a similar material with flat stones attached to the exterior to create the appearance of a stone wall. Check out our exterior stone veneer ideas!
Other types of stone walls are named for the stone you use to build the wall. Common natural stone materials include:
Granite
Sandstone
Slate
With these materials, you can place a greater emphasis on design and style. Imagine a grand granite wall or elegant limestone wall.
Every stone wall begins with the right material. The stone you choose will influence not only the appearance of the wall, but also its weight, texture, and long-term durability. Whether you’re aiming for a rustic boundary or a refined garden accent, selecting the right stone is key.
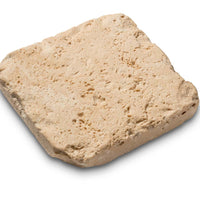
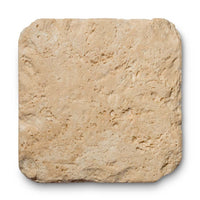
If you're drawn to the look of traditional craftsmanship, a fieldstone wall offers timeless appeal and a more organic finish. For a structured appearance, consider stone masonry techniques with hand-selected pieces that emphasize pattern and consistency.
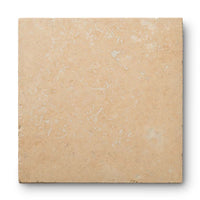
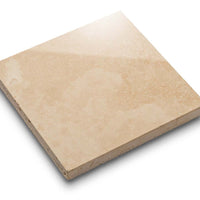
Limestone, one of the most enduring and versatile stones, is a popular choice for both freestanding stone walls and modern architectural stone veneer applications. Its soft tones and weathered texture can easily complement both classic and contemporary landscapes.
Design-forward builders may explore stone tile mosaics for decorative elements or low-profile thin stone veneer for cladding existing structures. These lightweight materials provide the visual impact of a solid stone wall with easier handling and installation.
Whichever direction you go, whether rustic, refined, or something in between, MATERIAL offers curated stone wall materials to match your project’s vision and performance needs.
Before you build your wall, here are four critical considerations:
Find a Location – Before you build a stone wall or even purchase the materials, decide where you want to place it. Adding a stone wall to your backyard can create additional seating and a defined border to delineate your patio from your garden or yard. Stone walls can also double as retaining walls to level landscape. The possibilities are endless, so put some thought into the location of your stone wall.
Select the Material – As noted above, stone walls can be built from various materials, each with its distinct advantages. Consider the height and structure of the wall and the aesthetic elements that you want to highlight.
Consider Longevity – Stone walls are known for their astonishing endurance, and the different styles and materials you choose play a significant role in your stone wall’s life. Freestanding-mortared walls can last decades. However, if you want the simplicity of a dry-laid look, use dark gray pigment and a brick jointer to trowel the joints between the capstones.
Explore Simple Solutions – If building a stone wall from scratch isn’t your idea of a good weekend, try adding stone veneer panels to exposed foundation, cinder block, concrete, or framed walls.1
For this guide, we’ll deconstruct how to construct a freestanding fieldstone mortared wall. This wall will be durable thanks to the mortar, and it will be a medium difficulty project. Thus, many of the concepts applied here will be similar throughout any stone wall construction project.
When you’re ready to construct your wall, here are the six main steps:
Create the Footing – Begin by digging a trench. Your trench needs to be below the frost line and two feet wider than the wall. Next, line the trench with landscape fabric. The fabric should overlap by 12 inches at the seams. After that, you’ll add a six-inch layer of three-quarters-inch stone and use a plate compactor to tamp down on it. Continue this process until the footing is approximately eight inches below grade. Next, drive two stakes a foot from each end of the straight wall section. The distance between the stakes should be as wide as the wall itself.
Lay the Base Course – You need to attach the stakes to a mason’s line just above grade. Lay the first stone at a corner of a wall with its exterior touching the line. Add the second stone against the first and continue until you finish the first course. You will follow this process on the opposite side as well. Add smaller stones between each row in line with the tops of the larger stones and finish this course with a bed of mortar.
Build the Upper Layers – Before you build the second course, move the line higher up on the stakes. Start again from a corner but make sure to dry-fit each stone before you set it. The exterior of each stone should barely touch the line, and the vertical joints should be staggered. After you dry-fit each stone, remove it and spread mortar on the wall. Pack the stone into the wall with a mallet so that its visible edges only touch stone rather than mortar. Wipe away any extra mortar.
Mark Each Stone – As you continue to build, you might need to cut some of the stones so they fit. To cut a stone, mark the extraneous sections of the stone with a wax pencil and remove them with a three-inch carbide chisel and three-pound hand sledge. Don’t forget your safety glasses! Remember that the joints in the wall should be less than an inch and a half wide.
Slice the Stone – To cut a stone, place it on the ground with its waste-side down. Put the chisel’s tip on the pencil line and hit the chisel once, aiming slightly downwards. Next, reposition the chisel so the blade is partly on the cut you’ve made and partly on uncut stone. Continue this process until you’ve removed all of the extraneous stone pieces.
Trowel the Joints – Use a brick jointer to trowel the joints between the capstones, giving them a slight sloping to drain water. If you’re working on a hot, dry, or windy day, spray the wall with water mist to ensure the mortar cures correctly. Next, add concrete along the base course from front to back to cement the wall in place. Make each wedge of concrete six inches high and 12 inches wide with a brick trowel and add backfill to hide them.2
Not feeling the freestanding fieldstone mortared wall? Here are four more quick tips for other stone walls to build:
Low Walls – To construct a low wall, choose cast-concrete blocks fixed together with masonry adhesive.
Taller Walls – To build taller walls, select cast-concrete retaining wall blocks. These blocks will include tongue-and-groove joints or pins that bolt the blocks together for increased durability.
Round Fieldstone Walls – Round fieldstone walls are a beautiful but slightly more complex choice. You will need to fit each stone together and mortar them in place. To add depth, rake out the mortar between the stones to add shadow lines.
Stone Veneer Walls – Craft a low-maintenance stone veneer wall with a concrete block or poured concrete. Use mortar to attach the stone veneer to the concrete.
Each city has specific zoning laws and building codes. Your city’s building authority will have the full details. Before you build, you should check for any relevant restrictions. Some cities require permits for retaining walls or an engineer’s stamp for any wall over a certain height, ranging from 30 inches to three feet. You also need to make sure you won’t hit any underground utility lines when you dig the trench for your wall. Dial 8-1-1 to reach the national “Call Before You Dig” hotline.5
If you’re still unsure how to make a stone wall, don’t fret. Not everyone has the tools, experience, time, or inclination to build their own stone wall, and that’s okay. Expert designers and stoneworkers can help you craft your perfect stone wall without you ever even having to lift a finger, or a trowel.
Since 1965, Materials Bespoke Stone + Tile has helped clients realize their design dreams with the classic beauty of stone. As the only stone and tile supplier in the United States to fully own and operate our own manufacturing facilities, we offer endless design possibilities and customizations.
Don’t settle for less. Browse our curated collection or visit a showroom to find the perfect fit for your next project.
Sources:
Gardening Know How. Stone Walls For The Garden: Stone Wall Options For Your Landscape. https://www.gardeningknowhow.com/garden-how-to/design/lideas/stone-wall-options-for-your-landscape.htm
This Old House. 4 Tips for Building Stone Walls in Your Yard. https://www.thisoldhouse.com/masonry/21017512/4-tips-for-building-stone-walls-in-your-yard
This Old House. How to Choose Materials for a Stone Wall. https://www.thisoldhouse.com/masonry/21124320/how-to-choose-materials-for-a-stone-wall
This Old House. How to Build a Stone Wall. https://www.thisoldhouse.com/masonry/21016582/how-to-build-a-stone-wall
The Spruce. How to Build a Stone Retaining Wall. https://www.thespruce.com/building-stone-retaining-walls-2131135
Please note: comments must be approved before they are published.
* indicates a required field
Our finishes are applied by hand, ensuring that each element of your order matches and blends together well. In some instances, you may notice a natural variation in the application of the finish. This is normal and should be expected with a handmade item.